1 day to go! Still not got all the Christmas shopping done? Feeling stuck for gift ideas? Feel the panic rising as you wish you’d thought about all of this at the beginning of December instead of a day and a half before Xmas??!! I swear, that yesterday was December 1st but when I woke up this morning and started packing my suitcase for Christmas away I had to admit that it was definitely the 23rd of December and in a blink of an eye a whole month had whizzed by. If you have woken up to the 23rd Dec in a breathless panic fear not and read on!
I am calming myself down by writing, baking and getting back on track. Here we go!

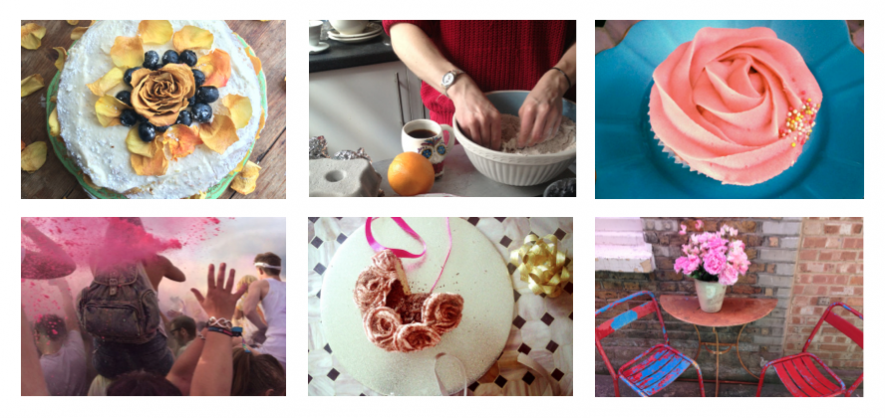
I like nothing better than giving gifts but I feel like I have exhausted all present ideas this year. I want to give the people I love in my life something that is original, thoughtful and most of all wanted! There is nothing worse that receiving a gift that there is either no room for in the house, that is whacked on ebay the minute the gift giver has walked out the front door or that hangs around the house for the next couple of years hidden in a corner only to see the light of day when said gift giver pops round. So I am baking gifts this Christmas knowing that each one is personal to the friend or family member I am giving it to. Plus it can be shared with others too. The love goes a long way!
Instead of slugging it down Oxford street, battling it out with the cold and all the other desperate shoppers stay at home, put the heating on, drink tea and listen to the radio while you tailor make a treat for someone you love. For an even more thoughtful and cost effective gift you can box and wrap them in things you make or design using bits and bobs from around the house. Some of these can even be hung on the tree and you can get the kids to help you too.
To wrap and box my presents I am using cellophane bags (these can be bought from any of the cake craft companies on line and egg boxes which I have painted in vintage white with tons of ribbon.
Baked blueberry Doughnuts dusted in cinnamon sugar.

What an absolute delight these little fancies are. Baked not fried and if you ask me and any of my friends that have eaten these they are better than the traditional. They are doughy, fluffy goodness, with a lovely golden colour. The deep purple blue of the blueberry jam is such a nice surprise in the middle and covered delightfully by cascades of cinnamon sugar dusted all over.
I want to thank Alida Ryder on Simply Delicious for this gorgeous recipe,especially for blueberry conserve. That is why this recipe caught my eye in the first place. I just love Jam! I think these could be lovely with Damson jam too.

Ingredients –
(makes about 16)
200g plain flour
1 tsp baking powder
100ml plain yoghurt
2 large eggs
1 tsp vanilla extract
150g butter, melted
150g caster Sugar
blueberry Jam
Cinnamon and caster sugar to dust.
Method –
Pre- heat the oven to 180°c
1-Mix together dry ingredients in a bowl. Melt the butter in a sauce pan.
2- In a separate bowl, mix the eggs, yoghurt and vanilla together and butter to our dry ingredients and mix genially.
2 -In a greased muffin or fairy cake tin place 1 tbsp of the mixture into each hole then add a tsp of the jam and another tbsp. of mixture on top making sure you can not see any of the lovely jam.
3 – Place the tray in the middle of the oven for 15-20 minutes until golden.#
4 – Put onto a cooling rack and cool for 4 – 5 mins.
5 – Get a big bowl and dust in caster sugar and cinnamon and mix then add each doughnut and coat each lovingly with your fingers I dusted it as I went too. As much sugar and cinnamon as you please.

Fiery Ginger and chili chocolate love bites!

I call these my love bites. They are basically cake pops that have been toppled off their stick towers. The great thing about these is that you can get really creative with the recipe and if you haven’t had that much experience in experimenting with baked food recipes before these are perfect to mess around with as the steps are the same every time and you can pick and choose which cake you like best and what wet ingredients you want to use too.
I am doing 3 different recipes this year for gifts where the method is the same each time.
STEPS –
Step 1 – Prepare and make your favourite ginger day recipe. I have 2 I love. Check out Marry Berries Ginger cake or Leith’s Treacle ginger cake (this has a really intense flavour and is sticky perfection).
Step 2 – Once baked and cooled it’s time to roll up your sleeves and get your hands dirty. This is the best bit. Break the cake down and rub between your fingers we are aiming for a bread crumb consistency.


Step 3 – In a separate bowl add 3 tablespoons of full fat cream cheese and 3 table spoons of icing sugar (confectioners) and mix together,
Step 4 – Add the wet mixture to the cake crumbs and mix in. The cake is turning into a dough. Now it’s time to shape into balls. With a table spoon scoop out a heaped table spoon of dough (we want able 1 tbsp and a half of mixtures for each ball. Roll between your palms to make them as round as possible.
Step 5 – Stick each ball with a tooth pick (this is going to help you to coat the balls in melted chocolate later). Put all balls into an air tight container and freeze for around 3 hours.
Step 6 – Melt 100g of Green & Blacks Chilli Chocolate and 100g of 75% dark chocolate. I do this by putting a bowl in the microwave and melting for 2 mins checking and stirring around 2 times. Add a pinch of chilli powder from the Cupboard to the chocolate for added zing!
Step 7 – Now we are going to dip each love bite in chocolate making sure they are covered all over. What to do next? Well I am lucky enough to have found myself some Styrofoam which can hold my love bite laden tooth picks but here are 2 other options if you don’t happen to have any foam (don’t ask me where I got it, no idea!).
Option 1 – Grab 2 tins of tomatoes , baked beans etc.. and balance a cooling rack on top. The tins should be either end of the wrack. Thread the tooth pick through the wrack with the love bite resting on top of the rack. Option 2 – put the love bite on some baking paper with the tooth pick sticking up.
Step 8 – Allow to cool for an hour. Pull the tooth picks out gently. If there are some rather obvious holes left add a little melted chocolate to tidy up.
Hay presto you are done!
Lemon, white chocolate and Pistachio Love bites in egg boxes.

Ingredients –
Favourite Lemon sponge.
Good quality white chocolate for the dipping
Grated lemon rind
3 Table spoons Cream Cheese ( or unsalted butter)
1 Handful of Pistachio (crushed).
1 lemon
3 tablespoons Icing sugar
Method –
1 – Just as before go through the same method as with the ginger cake to get to cake crumb stage.
2 – Grate one Lemon rind into the cake crumbs
3 – Add the cream cheese and icing sugar and form the dough
4 – Melt the chocolate and get dipping
5 – Sprinkle on the crushed Pistachio and allow to set.
Peanut butter and milk Chocolate bombs

Ingredients –
Favourite vanilla Sponge
3 table spoons Peanut butter
2 table spoons Cream cheese
3 tablespoons Icing sugar
Best quality Milk Chocolate.
1 – Just as before go through the same method as with the ginger cake and lemon cake to get to cake crumb stage.
2 – Add the peanut butter, cream cheese and icing sugar and form the dough
3 – Melt the chocolate and get dipping
4 –Allow to cool and you’re off.
Christmas Label Sugar cookies dipped in dark orange chocolate (Perfect to hang on the tree)
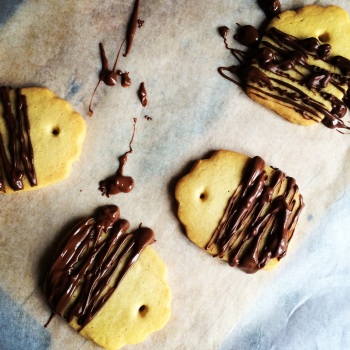
These are great fun to make and a number of them accidentally got broken which meant I had to keep eating them as I went (it’s so hard doing my job!!) Light, crumbly and buttery dipped in Orange dark chocolate for the adults and milk chocolate and dusted with glitter for the kids. I will be having a glittery one this year as at Christmas I revert back to about 10 years old. It’s a funny thing. It usually starts when I am sent to sit with my cousins on an old picknic table that has been brought in from the shed and is masquerading as the other half of the dining table. We sit on stools or old boxes of books pretending to be chairs and pretending (not very well) at being comfortable! It’s the kids table but the problem is we are now all between 21 and 32.
There will be 18 of us this year on Christmas day and everyone has a label each. I will be hanging these on the tree the night before Christmas so that first thing in the morning we can pluck them off and eat them before breakfast! So you will need some ribbon for this!
These are from a lovely little recipe I saw in Jamie Oliver’s Magazine last Christmas. Make these on Christmas Eve with any young cousin’s, nephews or daughters that need amusing. Or in my case the boyfriend!!
Ingredients – (makes about 20 ish)
300g Plain four
150g caster sugar
250g butter (room temp)
1 egg yolk
1tbsp milk
(1tsp) vanilla extract
200g Dark Chocolate Orange and 100g Milk Chocolate.
Ribbon
Edible Glitter or anything else you would like to decorate with.
Method –
1 – Preheat the oven to gas 180°C
2 – In a large mixing bowl whip together butter and sugar until smooth and fluffy .
3 – Beat the egg yolk, milk and vanilla in a jug/bowl and add to our butter/sugar mixture.
4- Add flour and mix until we bring a dough together.
5 – between 2 sheets of baking paper roll out the dough to just under 1cm thick Cut shapes out with your label cutter. Now to make the holes to thread your ribbon through. After looking through the cupboard with my friend for sometime considering many different baking tools she suggested then end of a birthday candle to make the holes. Which were perfect! Otherwise if you own a skewer that would do (but a bit trickier).
6 – With a pallet knife lift biscuits on to a lined baking tray. Bake for 20 minutes golden in colour( make sure to whip them out before the edges start to deepen in colour) we want a nice even colour. Place on a cooling rack.
7 – Melt the each chocolate in the microwave for 2 mins, checking twice and stirring. Dip half of each biscuit in the chocolate. Let the excess drip off then place on a sheet of baking paper. Leave to set. With my glitter and milk chocolate labels I dripped chocolate with a tsp back and forth over half of the biscuit.
8 – When all set grab your self some Christmassy ribbon thread through each biscuit label and hang on the tree!

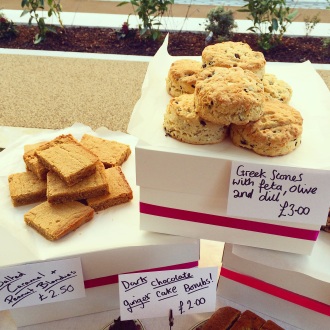
Spiced Carrot cake squares with white chocolate.

You can make a gift out of most cakes. My friend loves carrot cake but instead of making her the whole cake I have made this as I tray bake, cut up into bite size squares and lovingly smothered in white chocolate. Adorable little gift. This can now be eaten and possible shared if she lets anyone get their grubby little mittson these on their car journey over to France. I have gone for an alpine, chalet, ‘we’re off skiing’ vibe with my decoration to get her in the mood. This can be done with any favourite cake. But the reason this works so well is that carrot cake is sturdy and moist.

I am fully loaded with gorgeous edible gifts and I hope this has helped with a little Christmas gift inspiration.
Much happiness and rest over the Christmas holidays and all the luck and success for the New year.
Happy Christmas everyone,

Yours truly,
The Cake Diaries xoxo